

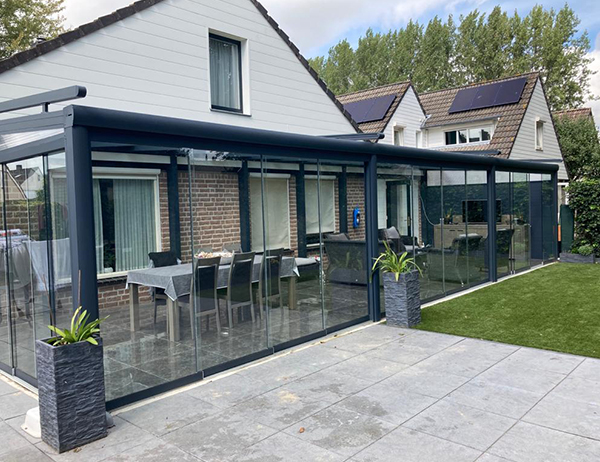
Heeft u een gloednieuwe veranda die nog op een inrichting wacht? Of wilt u uw huidige veranda gezellig opnieuw inrichten? In beide gevallen is het fijn om te weten waar u begint. We delen graag wat tips om u op weg te helpen. Zo kunt u uw buitenruimte transformeren tot een plek waar u echt graag bent.
Onze tips: zo kunt u uw veranda inrichten
De belangrijkste stap bij het inrichten is het kiezen van het meubilair en de accessoires. Daarbij loont het om spullen te kopen die bij elkaar passen en buiten kunnen blijven staan. Met onderstaande zaken kunt u rekening houden bij het kiezen van de meubels en accessoires.
Bepaal eerst het doel van de veranda
Voordat u het meubilair uitzoekt, is het handig om eerst te bepalen waar u de ruimte voor wilt gaan gebruiken. Wilt u er ontspannen, eten, koken? Zou u er een jacuzzi willen plaatsen? Wilt u ook laat ’s avonds of in de winter uw veranda gebruiken? Dit heeft natuurlijk invloed op de meubels die u nodig gaat hebben, dus beslis dit van tevoren.
Bedenk welke meubels u nodig heeft
Zodra u het doel van de veranda bepaald heeft, heeft u meestal ook al een idee welke meubels nodig zijn. Een tafel en stoelen om te kunnen eten, een bank of hangmat om te relaxen, een terrashaard voor kouder weer. Misschien wilt u een tafel om buiten te kunnen werken. Een jacuzzi of buitenkeuken zal veel ruimte innemen; overweeg of er praktisch ruimte is voor ander meubilair.
Kies eerst één sterk basismeubel, zoals een tuinbank, loungeset of tuintafel. Met een basis is het veel makkelijker om de rest van de ruimte logisch op te bouwen. De stijl van het basismeubel kunt u dan gebruiken om de styling van de rest van de veranda te bepalen. Als het basismeubel bijvoorbeeld blauw is, is het mooi om blauw ook als hoofdkleur te gebruiken voor de andere meubels.
Andere praktische tips
Deze zaken zijn belangrijk zodat u op de lange termijn blijft genieten van de inrichting van uw veranda:
- Let erop dat het meubilair en de accessoires gemaakt zijn van een materiaal dat buiten kan blijven. Of kies voor spullen die u gemakkelijk binnen kunt opbergen. Het is natuurlijk zonde als uw mooie inrichting roest, schimmelt, wegwaait of verkleurt. Of als de meubels beschadigd worden door vogelpoep of dieren die eraan knagen.
- Kies planten die goed tegen weinig zonlicht kunnen.
- Kies buitenverlichting die waterdicht is en plaats deze zodat niemand erover struikelt of zijn hoofd ertegen stoot. Als er een opstapje of trapje is, verlicht dat dan goed, zodat niemand er in het donker over valt.

Onze ideeën: zo let u op de styling van uw veranda bij het inrichten
Meubels, accessoires en decoraties zijn er natuurlijk in allerlei soorten, maten en stijlen. Denk vooraf na over de styling van uw veranda tijdens het inrichten. Zo zorgt u ervoor dat alle spullen bij elkaar passen.
We hebben deze ideeën verzameld ter inspiratie:
- Als de zijkanten van de ruimte open zijn, voelt het snel alsof de meubels er wat willekeurig staan. Een mooi vloerkleed kan daarbij helpen. Als de meubels op hetzelfde vloerkleed staan, voelt het meer alsof ze allemaal deel zijn van dezelfde ruimte.
- Plaats planten onder uw veranda voor een groene touch. Bijvoorbeeld klimop of schaduwbestendige potplanten.
- Met de juiste verlichting kunt u uw veranda makkelijk gezellig inrichten. Kies bijvoorbeeld voor lichtsnoeren, lantaarns of wandlampen.
- Kies accessoires zoals kussens, plaid en tafellinnen in dezelfde kleurtinten. Dat maakt de inrichting visueel rustiger. Hier en daar een contrasterende kleur kan de aandacht trekken en komt speels over.
Geniet van uw mooie veranda!
De inrichting maakt het verschil tussen een veranda die u af en toe gebruikt en een comfortabele ruimte waar u dagelijks graag zit. Denk na over het doel, kies een stijl die bij u past en let op de verlichting en materiaalkeuze. Met onze tips kunt u uw veranda zelf praktisch inrichten.
Twijfelt u nog over de opzet zelf, bijvoorbeeld de afmetingen of de overkapping? Daarmee kunnen wij u helpen. Dan nu de belangrijkste tip: vergeet niet te genieten van uw mooi ingerichte veranda!
The sun is shining, the birds are singing, and it is time to enjoy your garden to the fullest. To expand the garden and increase its value, you have decided to build a veranda. Good choice! With a veranda you can enjoy the garden all seasons long. It does not matter whether the sun is shining or it is snowing; with a veranda you can sit nicely in the garden, especially when you windproof veranda makes. Before you start planning your dream veranda, there is an important question that needs to be answered: can you build a veranda without a permit?
In the Netherlands, there are specific rules and guidelines that determine whether you can build a veranda without the hassle of permit applications. In this blog, we will delve deeper into this subject so that you can start your veranda project well-informed and with confidence. Read on to find out if you can build that gorgeous veranda without a veranda permit.
Do I need a building permit for my veranda?
A veranda can be a great addition to your home. It provides a relaxing outdoor space where you can enjoy the fresh air, feel the nature around you, and receive guests. In the Netherlands, a veranda is considered an outbuilding. You are not allowed to build more than 40 m² of outbuildings in total. For example, the veranda may not be larger than 20 m² if you have already built a utility room of 20 m². If the veranda is larger, a building permit must be applied for. Since the introduction of the Environment and Planning Act (Omgevingswet) on January 1, 2024, municipalities can include additional rules for permit-free construction. As a result, a veranda that is permit-free in one municipality may still require a permit in another. Therefore, always check the current rules via the Environmental and Planning Desk before you start building.

General guidelines for building a veranda without a permit
In the Netherlands, there are specific guidelines for building a veranda without a building permit. These guidelines are intended to ensure that the structures are safe and do not cause damage to the surrounding area. In general, if your veranda meets these criteria, you do not need a building permit:
Veranda dimensions
An important factor in determining whether you need a permit is the size of the veranda. According to current legislation, in most cases you can build a veranda without a permit if it is no larger than 30 to 40 m².
In most cases, you can therefore build a veranda without a permit if it is not larger than the specified square meters. This is a generous surface area that offers most people enough space to enjoy their veranda.
If the veranda is placed under 30-40 square meters, there is no reason to worry about the permit. Is the veranda larger? Then consult your municipality or take non-binding contact contact us. We are always ready to answer your questions.
Placement and location
The placement of the veranda on your property is also important. Ensure that the veranda maintains a sufficient distance from the property boundaries and that it does not infringe upon the privacy of the neighbors. This can vary depending on the municipality where you live, so it is advisable to consult local regulations.
You cannot freely enjoy a veranda everywhere. There are exceptions to this rule. For example, if your veranda is built in a protected nature reserve or near a listed historic building, stricter rules may apply.
It is always wise to contact the municipality where you live before you start construction. They can provide you with specific information regarding your situation and any additional requirements.
Have you also been hesitating for a while about building an attached carport? Read on our article about the things you need to consider when building a carport.
Safety and quality
Regardless of the size, placement, and location of your veranda, it is essential to ensure that the structure is safe and of good quality. This not only guarantees the safety of the users, but also extends the lifespan of the veranda.
In short, building a veranda can be a great way to expand your living space and enjoy the outdoors. Hopefully, we have been able to answer your question: can I build a veranda without a permit? In most cases, you can build a veranda without a building permit if it is no larger than 30-40 square meters. However, it is crucial to consult local regulations and possibly discuss with the municipality to ensure you meet all requirements.
Would you like more information about building a veranda without a permit? Do you have specific questions about your situation? Are you curious how much it costs to have a veranda built by Valk Veranda exactlyThen please contact us and request a free quote On.
Once the veranda is built, you will naturally want to enjoy a mosquito-free environment in the summer. Read our tips against mosquitoes under your patio roof here.

Frequently asked questions about building a veranda without a permit
Do you always need a permit for a veranda?
No, in many cases you can build a veranda without a permit. This depends, among other things, on the location, dimensions, height, and the rules that apply within your municipality.
How large can a veranda be without a permit?
There is no fixed maximum surface area that applies to every situation. The permitted dimensions depend on the size of the plot, the placement of the veranda, and the applicable building regulations. Therefore, always check the current conditions.
Can a veranda be placed on the property boundary?
That is not always allowed. For a veranda on or close to the property boundary, additional rules may apply. In addition, it is wise to make agreements about this with your neighbors to prevent future discussions.
What happens if I do need a permit after all?
When it turns out that your veranda cannot be built without a permit, you must first apply for an environmental permit. If you start building without a permit while one is required, the municipality can take enforcement action.
How do I know for sure if my veranda is exempt from permits?
The most reliable way is to check the rules of your municipality or seek advice from a specialist. This way you avoid surprises during or after the construction of your veranda.
Have you wanted to build a carport attached to your house for a long time, but have no idea what you need to take into account? Then Valk Veranda is the right place for you. After all, there are a number of things that are very important for building a decent veranda. Fortunately, you can build a carport following a handy step-by-step plan that we share with you in this article. With our tips, you will have your own carport before you know it, which you will enjoy for years to come!
The importance of a carport foundation
Whether you are having a carport built onto your house for a car, caravan, or other vehicle, everything starts with the foundation of your carport. Here you can choose between 2 options:
- A foundation where piles are driven into the ground to provide stability for the carport.
- A foundation that uses floor slabs. This is specifically intended for paved surfaces, as it is a lot more difficult to drive piles into the ground on these surfaces.

Rainwater drainage: prevent problems with the correct drainage
Taking rainwater drainage into account is not only essential because the roof can become too heavy if the rainwater is not drained, but also because without proper drainage you may also suffer from green deposits. Your carport must have a specific slope of at least 1 to 2 percent. This allows the rainwater to slide off more easily through a downpipe and prevents blockages.
Location and dimensions
If you plan to have a carport built attached to your house, you must have exact specifications on paper of where it should go and what dimensions the structure needs to be. Choose a spot where you have the most space available and where you do not inconvenience the neighbors. If your neighbors are also interested in a carport, it might be a fun project to undertake together. That way, you and your neighbors might soon enjoy the benefits of a carport.
Benefits of building a carport attached to the house
Besides the fact that a carport provides a positive appearance and also increases the value of your home, it has even more advantages. We have listed these benefits for you, so that you can carefully consider your choice and know exactly what this investment can yield for you.
- Protection of your car: Building a carport attached to your house is ideal if you want to keep your car dry. This way, your car will no longer be exposed to annoying hail or snow storms or other unwanted weather conditions. If trees around your home also cause damage to your car, you can prevent this in the future with a carport as well. It is also an ideal solution for working on your car.
- Cheaper: Although most homes in the Netherlands have a garage, unfortunately, this is not always standard. A carport without an attached garage can be a solution for households that still want to enjoy these benefits. Building a carport attached to the house is also a lot cheaper than building a garage.
- Luxe Of course you can make it as expensive as you like, but in general, building a carport is an inexpensive luxury. You can easily get in and out of your car dry and you are always guaranteed your own parking space. Ideal!

Step-by-Step Guide to Building a Carport at Home
You can build a carport at home in six simple steps. The step-by-step guide is summarized below, so you can get started building your carport right away!
- Step 1: Determine in advance where you want to place the carport. Check carefully whether there is enough space, whether it optimally shields your vehicle from external conditions, and whether the neighbors will not experience any nuisance from the structure. It is also advisable to check local regulations regarding infrastructure and the zoning plan before building the carport. Then configure your carport online and order them easily.
- Step 2: Make your surface as clean as possible and check that it is level. With this information you will prevent problems during construction.
- Step 3: The foundation may be installed after the first and second steps. The carport's foundation is always set deeper than the foundation for the paving.
- Step 4: Once the foundation has been laid, the carport may be assembled. The carport kit set you with the Installation Manual Assemble it in a few steps. Make sure everything is dry and properly assembled beforehand.
- Step 5: The roof can be put on. This is, of course, what it is all about, because you want to make sure that everything underneath stays dry and protected.
- Step 6: As we have already emphasized, installing drainage is very important. This ensures that you will not suffer from buildup or standing water on top of your brand-new carport.
Design a carport at Valk Veranda
We at Valk Veranda hope to have provided you with sufficient information so that you can get started with building your own carport. Would you prefer not to do this yourself, but leave it to a professional? No problem, we can also completely take care of it for you and assemble the carport. Read more about our carport installation here. Are there still any issues regarding the Building Your Own Porch and the permit for this? Then feel free to take a look at our assortment.
After placing the order, we will schedule an appointment together for a time that suits both parties. Our team of specialists delivers custom work, and a solution can be devised for every home. In addition, we deliver top quality only; should it happen that something is wrong with the carport supplied by us? Then take contact Contact us and claim your 10-year warranty. We hope we’ve provided you with enough information and look forward to seeing the final result. Click here for a custom carport!
A beautiful one porch or patio is not complete without good sun protection. It provides shade, comfort, and extends the time you can spend outdoors. But like any other part of your outdoor space, awnings also require maintenance. Cleaning awnings is important to extend their lifespan and keep their appearance fresh. But how often should you actually do this and why is it so important?
Why it is important to clean your awnings
A sunshade exposed day in and day out to various weather conditions: rain, sun, wind, and sometimes even hail. Dust, sand, and algae slowly accumulate, making the fabric that you thought would last for years not only look dirty, but also wear out faster. By regularly cleaning the awning fabric, you prevent dirt from setting in and keep the material in top condition.
In addition, hygiene plays a role. Moisture and dirt can lead to mold formation or green deposits. These become more difficult to remove if you wait too long to clean. Proper maintenance therefore not only ensures a neat appearance, but also prevents unnecessary costs for repair or replacement.
How often do you need to clean an awning fabric?
In general, it is recommended to clean your sun protection at least twice a year: once in the spring and once in the autumn. This way, you start every season with fresh and well-maintained awnings.
- Spring: clean the awnings to remove pollen, dust, and winter dirt.
- Autumn: Remove leaves, moisture, and dirt residue so that the fabric goes into the winter clean.
Depending on the location and usage, cleaning your awning may be necessary more often. For example, is your patio roof close to trees or do you live in an area with a lot of traffic and particulate matter? Then it is wise to clean your awning more frequently.
We also recommend preparing your veranda for the season twice a year: once before winter and once before spring/summer. By getting your patio ready for winter, ensures that you can enjoy it even in cold weather.

Cleaning the screens of your awnings
Not all awnings are the same. Cleaning screen awnings, for example, requires a slightly different approach than cleaning traditional fabric. Screens are made of sturdy, mesh-like material that can trap dirt. Rinse the surface regularly with lukewarm water and use a soft brush or cloth to keep it clean. Avoid aggressive cleaning agents, as they can damage the material.
Tips for cleaning sun shading yourself
Want to get to work yourself? With these tips, you will ensure the best result:
- Use lukewarm water and a soft brush, this prevents damage.
- A little bit of soft soap is enough to loosen dirt.
- Do not use a high-pressure washer! This can damage the fibers of the fabric or screens.
- Let it dry thoroughly and only roll up the awning when the fabric is completely dry to prevent mold growth.
Cleaning your sunshade fabric yourself is often quite doable, as long as you carefully follow the right steps. This keeps it looking good for longer and ensures it lasts for years. Are you in doubt whether you are doing it right, or do you want to be sure of the best result? Then you can always a specialist contact us for no-obligation advice or let us handle the cleaning for you in a professional manner.

The advantage of regular cleaning
By keeping your awnings regularly cleaned, you extend their lifespan and prevent expensive replacements. Moreover, clean awnings look inviting, which immediately increases the comfort of your veranda or patio. Therefore, it is a small investment in time that pays off handsomely in the long run.
Whether you choose to clean your awnings yourself or prefer to hire a professional, maintaining your awnings is very important. It extends their lifespan, keeps your patio cover looking well-maintained, and prevents unexpected costs. With a little attention a few times a year, you can enjoy a fresh, comfortable outdoor space for longer. Do you have any questions about cleaning your awnings? Please contact us!
If you are thinking about expanding your outdoor space, building a patio cover is an excellent option. However, a frequently asked question is: ‘can I also attach a patio cover to the shed?’. The answer to this is positive: yes, you certainly can!
In this article, we discuss the benefits, considerations, and steps you can take to create a patio cover with a shed. Contact us!
Why choose a patio cover attached to the shed?
The choice for a patio canopy attached to your shed offers many advantages. One of the biggest advantages is its multifunctionality. A veranda attached to the shed provides a comfortable outdoor space that you can use all year round, while a shed offers storage space for garden tools, bicycles, and other items. In addition, you can use the patio canopy for various purposes, such as an outdoor kitchen, a lounge area, or even as a workspace.
In addition, a patio roof with a shed adds value to your home. Not only does it improve the appearance of your garden, but it also increases the usability and value of your house. This is especially useful if you are considering selling your home in the future.
Another important aspect is comfort. A veranda offers protection against various weather conditions. You can sit cool and in the shade in the summer, while in autumn and winter you are sheltered from rain and wind. This significantly extends the period during which you can enjoy your garden.

Realization of your ideal patio cover with shed: steps and considerations
Planning and design
Before you start construction, it is important to have a clear plan. Consider the size of your garden and the design of the patio cover. How would you like this attached to your shed? Would you like an open patio cover or one with side walls for extra protection? Also consider the location relative to the sun, to make optimal use of light and warmth. In addition, it is important to think about drainage, so that rainwater is efficiently discharged and does not cause problems. By thinking carefully about these matters, you can ensure that you can realize your desired patio cover.
Permits and regulations
An important aspect of building a patio cover attached to your shed is local regulations. Depending on the size and location of your cover, you may need a building permit requires. Consult the local government or a construction expert for this.
Can a porch be built without a permit? Find out in this article.
Choice of Materials
The choice of materials is another important consideration. Will you go for wood, plastic, or perhaps a combination of materials? Each choice has its own maintenance requirements and appearance. Wood, for example, offers a natural and classic look, while plastics such as polycarbonate have a more modern appearance and often require less maintenance.

Maintenance
Maintenance is an important aspect of a patio cover. Regular cleaning Proper care and maintenance ensure that your patio cover continues to look its best and extends its lifespan. In addition, regular maintenance helps prevent any damage caused by the elements or wear and tear, ensuring that your patio cover with shed remains a beautiful addition to your home for years to come.
Construction and Safety
Building a patio cover attached to a shed requires precision and attention to safety. Make sure the cover is securely attached to your shed and that the roof is strong enough to withstand the elements.
It is recommended to use a professional such as Falcon Veranda to consult or hire for the construction of a patio canopy against your shed. Valk Veranda is ready to assist you or completely relieve you of the burden of putting together, delivering, and assembling the perfect patio canopy. If you prefer to get to work yourself and like to roll up your sleeves, it is recommended to this blog Please review this before you begin constructing the canopy.
Whether you choose a do-it-yourself approach or enlist the help of Valk Veranda, a patio canopy attached to your shed will be a wonderful addition to your home and garden. View our range of patio canopies
Do you want to enjoy your garden all year round? Then an attached veranda is the perfect solution!
It offers an ideal place to relax, breathe in the fresh air, and enjoy the view of your garden. Moreover, it can expand your living space and increase the value of your home. If you are considering adding a veranda to your home and are willing to roll up your sleeves yourself, you can choose to build a veranda yourself with our veranda DIY kit from Valk Veranda. In this blog, we will explain how you can do this. Click here for a veranda construction kit
Step 1: planning and design
Before you start building the veranda yourself, it is wise to make a plan and design. Here are some steps to help you with the planning process:
- Select the location: determine where you want to place the veranda. Ensure that it matches the look of your house and that it is accessible from your living space. For example, do you want to attached to your build a shed? Click here for more information.
- Make a design: draw a detailed design of your veranda, including dimensions, materials, and any extra features such as windows, doors, or roofing.
- Check the building regulations: Check the local building codes and permits that apply to building a veranda in your region, for example in connection with the borderline. Make sure you meet all legal requirements. Would you like to know the maximum permitted height of a veranda? Then take a look at our blog about this!
Step 2: materials and tools
Now that you have made a design, it is time to gather the necessary materials and tools. Here is a list of some common materials you will need to build your own veranda:
- Wooden beams and posts
- Concrete blocks or foundation piles
- Screws and nails
- Roofing materials such as roof tiles, corrugated sheets, or a shade sail
- Insulation material (if necessary)
- Windows and doors (if desired)
- Paint or stain
In addition, you will need a range of tools, including a saw, drill, hammer, spirit level, tape measure, and safety equipment such as gloves and safety glasses.
Step 3: build the foundation
The foundation of your veranda is of great importance for its stability and durability. Depending on your design and local building regulations, you can choose a concrete foundation or foundation piles. Make sure the foundation is level and strong enough to support the weight of the veranda.
Step 4: build the frame of the veranda
When you are building a veranda yourself, the frame is very important. After all, it forms the basis for the rest of the construction. Use the wooden beams and posts to build the frame according to the design you have made. Make sure the frame is level and sturdy. This is the time to add any windows and doors if you have included them in your design.
Step 5: add the roofing
The roof of your veranda protects against the changeable Dutch weather. Depending on your preference and budget, you can choose, for example, roof tiles and corrugated sheets. Make sure the roof is securely attached and well sealed to prevent leaks. Moreover, you awning can be added to the roof of the veranda. Sun shading blocks sunlight and heat.

Step 6: wall covering
If you want to enjoy your veranda all year round, go for a windproof veranda. If you decide to enclose your veranda with side walls, you can now install the wall cladding. This can consist of wooden panels, glass, or another material of your choice. Make sure the walls are well insulated so that your veranda is comfortable all year round.
Step 7: finishing and decoration
Now that the basics of building your own veranda are complete, you can proceed with the finishing touches and decoration. This includes painting or staining the woodwork, adding flooring or paving, and furnishing the veranda with furniture and decoration.
Falcon Veranda for professional help
Building a veranda yourself can be a challenging project, especially if you do not have much experience with carpentry and construction projects. If you find that you need help with planning or executing your veranda construction project, do not hesitate to contact Valk Veranda.
With our expertise, we are fully confident and ready to assist you or take complete care of the assembly, delivery, and installation of the perfect patio cover for your garden. We offer our customers the highest quality and provide a ten-year warranty. Contact us or view this page for further information about our verandas.
Read also our article about how to build a carport yourself and about what to do against mosquitoes under the patio roof.Contact us!